Call Today! 1-888-809-0219

Blog

Archive for the ‘Conversion Tracking & Analytics’ Category

A Recipe for Success in Business: Calculating Customer Lifetime Value (CLV)

Posted on: March 10th, 2016 by admin


Believe it or not, one of the most valuable marketing and easy-to-use metrics in business is also the most overlooked formula. It simply amazes me how many people are not using this formula. In a day and age where quantifying your data is crucial to a business’s success, it’s no wonder half of all startups are out of business within the first year. What is it you ask?


It’s called Customer Lifetime Value (CLV)— and it’s a game-changer for your business.


As an ecommerce retailer, service business, or any business which has recurring clients, knowing the CLV (also can be referred to as CLTV, LTV, and LCV) of your customers is one of the most crucial tools for your success. It helps to develop a healthy business model and profitable strategy as you intentionally invest in reaching the clients will grow your brand the best.

Customer Lifetime Value - CLV


Calculating the lifetime value of a customer also helps to:


Develop a more efficient customer acquisition

When you only focus your marketing channels based on the gross profit of an initial purchase, you limit the return on investments (ROI) of customer acquisition. Instead, you should be optimizing the channels that reach your most profitable customers in terms of their lifetime value. Understanding and implementing  the CLV into marketing strategies will enhance customer acquisition by giving you insight into the demographic that should be targeting. The trick is to maximize your customer lifetime value in relation to the investment or cost of customer acquisition to develop a recipe for success.


Create better and more personalized targeting and messaging

Relevance is key when it comes to reaching your targeted audience. Using CLV to segment your brand’s customer base is important because it gives you a more dynamic view of your ideal client. You can use it to create more personalized messages that speak to the clients who will directly benefit your brand in the long run.
 

Foster stronger relationships with your most valuable customers

Calculating CLV can help you choose where to direct your customer service resources by identifying your most profitable clients. After all, the Pareto Principle applies well when it comes to consumers: 80% of your revenue is generated by only 20% of your customers. So, giving particular attention and better service to the best customers will give you more support from them, which helps push up margins and make your business more profitable.
 

Identify and utilize behavioral triggers

You can use CLV to identify the behavioral triggers of your ideal clients. To figure out the most influential incentives that get your most valuable customers to make their first purchases, you can organize data into natural clusters and make comparisons. Try to better understand why certain triggers lead to purchases, and then replicate the triggers with prospective customers.


How to Calculate CLV of Customers

While there are multiple ways to calculate CLV, using the most basic formula focuses on the variables that you’re most able to control. Thankfully, it’s pretty simple to calculate with the breakdown of this awesome infographic from KISSmetrics:


(Average Order Value) x (Number of Repeat Sales) x (Average Retention Time)

KISSmetrics breaks down each step of the calculation of CLV using Starbucks as an example. The first step indicates how to find the average sale, which is the first variable. Then, the next step is to find the number of repeat sales, which is the number of visits per week in this case of the infographic (shown below). Then, the averages are plugged into the formula above to find the lifetime value of customer for that particular given time.

Another example could be applied to a monthly subscription service, like Spotify Premium. The membership costs $10 a month, giving their customers access to thousands of songs to listen to whenever and wherever they are without any ads interrupting. So, we could apply the formula in this way:


($10) x (12) x (3 years) = $360

So each subscriber has a value of $120 a year, or $360 if the if membership lifetime average is 3 years. For college students, they offer it at half price. So for those who flash their student IDs, their annual CLV is $60, or $180 for 3 years.

And with all the interrupting advertisements that play on the free Spotify accounts (not to mention being limited to shuffle play on mobile devices), the monthly subscription is a tempting offer. Then more questions arise: How does a free trial month of Spotify convince more people to subscribe? How many of those potential customers keep on subscribing? Is losing $10 for a potential customer worth it? Is losing $5 a month worth it on certain customers?

Calculating the CLV is made to answer those questions, helping you understand how to reach and keep the most valuable customers coming back for business. It can help you find innovative ways to increase the lifetime value of a customer by creating offers and building better service catered to you best clients.

Take the time to work through the numbers through this simple equation. Doing so when you’re early on in the business can give you a head start on building your brand towards your ideal client. Don’t forget to use variation to find out which strategies provide the best results. Ultimately, it’s what determines the strategy and success of your company.

In the coming week, I’m going to write a blog post about how to use your CLV in order to calculate how much you should spent to acquire a client (CAC = client acquisition cost).


Super Simple A/B Tests You Need for Your Website

Posted on: February 16th, 2015 by admin

“I don’t care for best practices, I care for conversions. That’s why I test.” 

-Michael Aagard, ContentVerve.com

 
If you’re not tech savvy or you’re new to the business world, implementing A/B tests on your website can be intimidating and sound like a lot of work. But the truth is, you don’t have to be an expert to get the results you’re looking for. Thankfully, there are companies who did the research for you so that testing your website will be a breeze:


CALL TO ACTION

Your website’s “Call to Action” is a key instrument in growing your business. Even testing the slightest changes can give you a higher conversion rate. First, try testing the color and placement of your CTA button. You can try doing something like Hubspot, who conducted an experiment that –surprisingly– resulted in the color red proving higher conversion rates than the color green on a CTA button.

Screen Shot 2015-02-15 at 11.15.00 PM

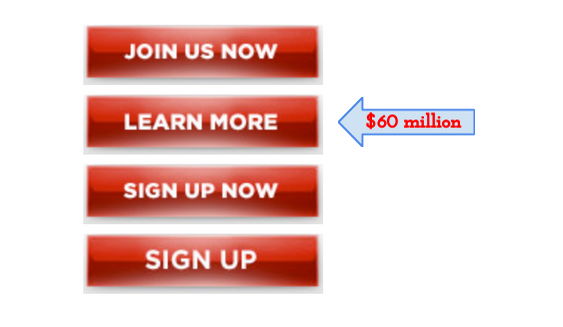
Or you can run an experiment like President Obama who raised $60 million by simply changing the CTA button wording from “Sign Up” to “Learn More.” Either way, you’re sure to get results as well as increase and impact user behavior when you test your CTA.


PAGE LENGTH

Should your landing pages have long or short forms? Interestingly, marketers seem to be divided into two groups — those who claim shorter is better and those who claim longer is better. To find the truth, ContentVerve.com ran case studies that tested long and short forms for different companies. As it turns out, both marketers are right: it all depends on what you want from your customers and what products you offer. Short pages are better for low commitment and low risk offers, whereas longer pages benefit from high commitment and high risk offers. Depending on your business, you may want to start by testing out page lengths on your site.

contentverve


COLUMNS

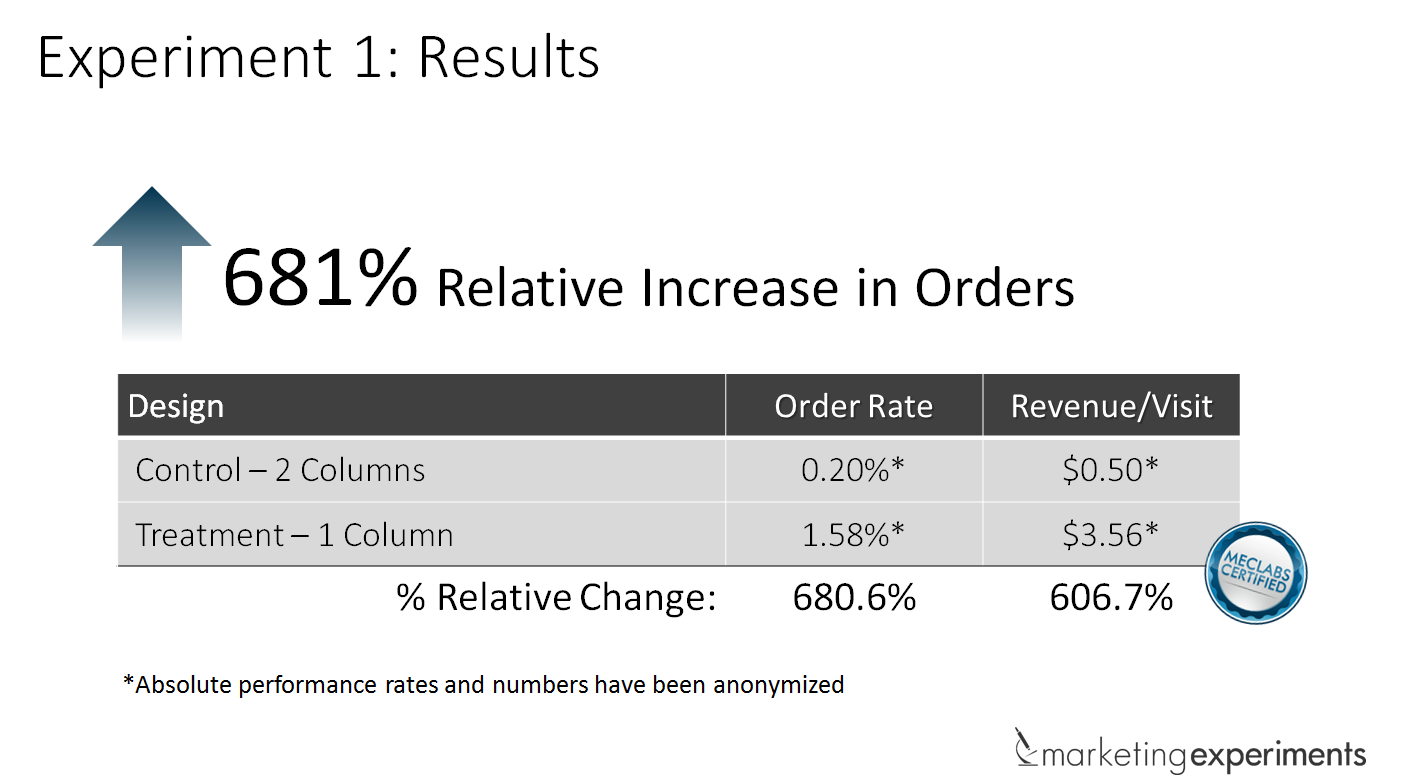
Why are columns a big deal? Maybe because finding the best page layout could increase conversion rate by 681%! MECLABS ran a test that proved switching from a multiple to a single column layout could significantly increase sales for a tech company. Results like that will definitely vary from site to site, but it’s obvious that having a multiple or single column layout makes an impact on any website. That’s worth testing, don’t you think?
 results-for-1-column-vs-2-column-test
 

NAVIGATION BAR

Utilizing your navigation bar enhances, and promotes more, user experience. Try figuring out the most influential layout that makes the biggest impact on customer’s behavior. You could switch the order of your tabs to direct traffic to the pages that are crucial for leads and sales. Even something as simple as testing different wording on each tab may tell you what gets you the most clicks. One test ran by Optimizely showed that changing a tab from “Why Use Us” to “How It Works” increased clicks by 47.7%.

formstack-nav-old-v-new


IMAGES

The biggest subliminal impact on your customers comes from optimizing your images. Depending on the type of industry you’re in, you will want to test out how featuring images of people or product can make conversion rates increase dramatically. And here’s something else to consider: bigger might be better. Econsultancy wrote about three case studies that demonstrated how enlarging the “hero shot” on a webpage page can also enlarge the conversion rate. But don’t just test size — consider other options such as using illustrations instead of photographs — or even creating an aesthetically pleasing negative space, like Apple.com’s monochromatic design.
 Screen Shot 2015-02-15 at 11.43.15 PM
 

SPECIAL OFFERS

It seems obvious that people generally prefer to have more options when it comes to making purchases. However, providing too many options can actually drive customers away. One company wanted to increase cart completions by simplifying the checkout process. They originally had three offers that a visitor had to select before checking out. Instead, the company integrated the options into the product details and focused on the checkout CTA. It resulted in 36.5% more cart completions. So it pays to test how simplifying CTA can influence the direction of your customer, even if that means simplifying your special offers and deals.

Shopping-Cart-Results


HEADLINES

Have you tested out the main text on your pages? You really should — it’s easy to generate more clicks and visitor engagement by simply modifying your header. WhichTestWon investigated how the layout and wording of different headers and sub-headers influenced the CTA to sign up. As it turns out, creating a more concise header with lesser details specified in the sub-header proved to increase sign up rates by 37%.

test1
 
 
Though the results of all these tests provide helpful guidelines for you, it’s important to remember that no industry has the same targeted demographic or product offerings. There can’t be a one-size-fits-all solution for improving your business website, which is why data should be the driving force behind the changes on your website.


Is it Best to Have your Call to Action on the Right or Left?

Posted on: February 14th, 2015 by admin

Why the Position of Your Call to Action Buttons Really Matters

If you want your call to action buttons to be effective then you need to understand the psychology of the users visiting your site. It’s well known for instance that a red ‘buy now’ button is more likely to get clicked than any other color and this is just one example of many of the tricks that internet marketers can use to increase their conversions.

But did you know that the position of your buttons also makes a huge difference?

This is all to do with the way that we naturally consume and explore information. When a user lands on your web page, they will tend to progress through the information there in a predictable way. Understanding this allows you to arrange your content in such a way that it gets seen in the correct order and thus control the way that your readers feel at any given point during their consumption of your text.

In short, the objective is then is to place your call to action buttons in the position where your readers will see them last and this will greatly increase their chances of clicking.

Where is the Terminal Area?

When someone lands on a home page, the first thing they will normally see is an image of the product, a headline, the supporting text and a call to action button. These are generally positioned to be in the focal point where our eyes naturally rest on loading a new page and the users will take in that information starting from the top left and moving downwards.

Your aim is to make sure that they see your headline/product image, then learn about why they should become a paying customer and then see the call to action button. This is important because if they see the button before they know what it is they’re buying, then they’ll be much less likely to click buy. Likewise, once they’ve finished learning about your business, they shouldn’t then have to make a conscious effort to search for your button and learn how to buy.

This perfect spot that follows on from your other content is what’s known as the terminal area.

So with that in mind… where precisely is this terminal area? Simply, it’s the spot at the bottom right of your home page and the bottom right in relation to your focal point. We read from top to bottom and from left to right and so something that is positioned at the bottom right is more likely to be the last thing seen.

The Gutenberg Diagram

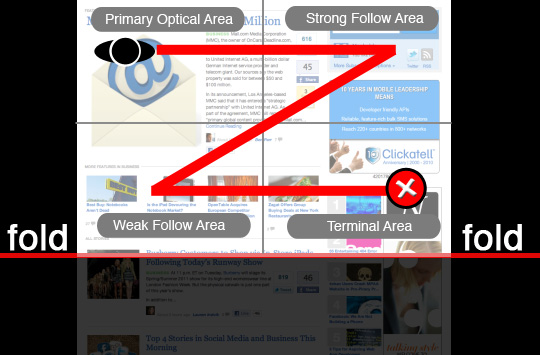
This concept comes from the Gutenberg Diagram which was originally posited by Edmund C. Arnold. This diagram is often referred to when optimizing displays that only have a limited number of elements and it works by dividing any given page into four sections. The top left is now your primary and initial focal point and the terminal area is at the bottom right.

gutenberg-diagram1

Another similar concept is the ‘F-layout’ which is a heat map of where users tend to look on a new web page. First they look along the top, then they look along the middle/just above the middle and then they look down the left side. This is why these spots are perfect for headers and menus but not buy now buttons. If your buy now button is on the bottom left, then your users will look there right at the start when they’re looking for the menu!

The Take-Home Message

The take-home message from all this is simple: your call to action buttons should be positions on the bottom right of your web pages if you want them to be effective. Many users will make the mistake of placing their buttons on the bottom left but countless hours of split testing and research by older and wiser internet marketers show us that sales go up when you move your button to the right. According to the Gutenberg diagram that bottom left square is the ‘weak follow area’ – in other words, the worst spot for anything important.

Of course there are exceptions to this rule. For narrow, centralized landing pages you can have your call to action in the middle as long as it’s at the bottom for instance (and likely you’ll have it interspersed throughout the text as well). In general though, moving your buttons slightly to the left can increase your profits. It takes two seconds to do, so what are you waiting for?

Credit Here


What are the top Alternatives to Google Analytics?

Posted on: January 14th, 2015 by admin

There are several problems with Google Analytics that have been discussed in different posts. However, despite the problems, Google Analytics remains a popular tool for a few reasons. The first reason is that it is free, until you reach about ten million page views a month. Once you reach this point it will cost you around $150,000 per year. The second reason that it is popular is because it has many features that are regularly being developed.

The question is, what if you do not like the fact that Google has access to that much data? Or dealing with the various problems that come up?

If that is the case it is time to start looking for an alternative to use instead of Google Analytics. Here are a few of the alternative choices that you can use. All of the alternatives will easily fit into most budgets as well.


1. Clicky

clicky-analytics

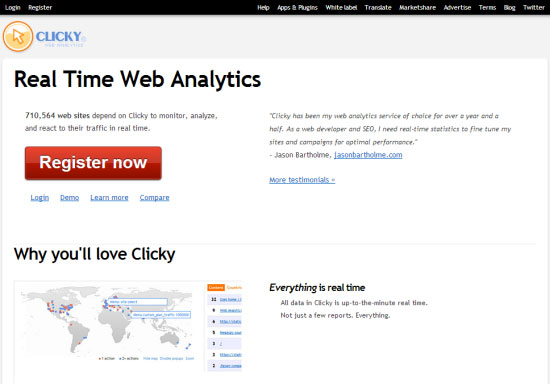
One issue that many people have with Google Analytics is that the interface is not easy to navigate. There is something about a system that is easy to use and fairly straightforward. At Google Analytics when the interface is changed the terminology used in the menu changes as well. This means that you will have to take the time to learn your way around the entire system once again.

Clicky does not use flash components and is very easy to navigate. This makes it easy to use from your mobile device. Most of the Google Analytics apps are limited so you cannot do much more than the basics when you are using your mobile device on the go.

Setting it up will require that you add a snippet of code to your website. There are several plugins and apps that make this process quite easy.

Some of the features of Clicky include:

  • Customizable tracking
  • View individualized visitor logs
  • Real time analytics
  • Funnel/path analysis

Goal tracking and split testing are available with a pro account, which costs $9.99 each month. Heat maps and uptime monitoring are available with a pro plus account, which costs $14.99 per month.


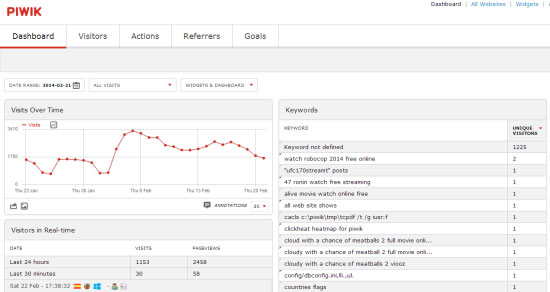
2. PIWIK

Piwik analytics

Another analytics package that is easy to use is PIWIK. The big difference when choosing PIWIK is that setting it up involves more than installing some code. If you do not choose the paid cloud service offered by the company then you will have to install the software on your server. There is an installation guide available that will help you get through this. The software is open source.

One of the best things about PIWIK is that they are really responsive when bugs are found within the system. They are also very transparent about fixing these bugs. As each item is fixed it is marked off on the log.

Some of the features of PIWIK include:

  • Goal tracking
  • Customizable dashboard
  • Free download of the plugin marketplace
  • View logs of individual visitors

If you host it on your own server the cost is free. The cost for the cloud service starts at 49€ a month for 300,000 page views and less.


3. Gauges

Gauges

Another affordable alternative to using Google Analytics is Gauges. It works in a much similar way as it provides you with a snippet of code in Javascript that can be added to each of your pages. The idea behind this platform is to provide actionable data through an interface that is easy and simple to understand.

Features:

  • Easy to use
  • Real time analytics
  • Team support (both large and small plans)
  • Dashboard is flash free, which is makes mobile viewing easier
  • API available

The cost for Gauges starts at $6 a month for up to 100,000 monthly page views and an unlimited number of sites.


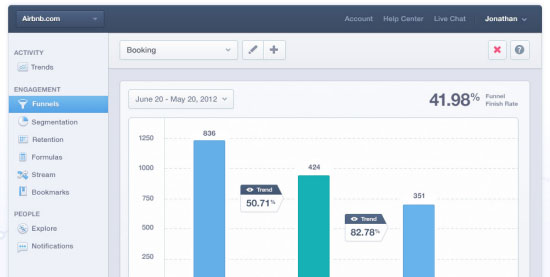
4. Mixpanel

Mixpanel

Mixpanel offers a platform that focuses more on events instead of page views. This is an important difference to note because in reality page views do not really tell you all that much. Mixpanel was designed for companies that sell services or products and it comes with a ton of features.

Some of the features of Mixpanel include:

  • Use funnels to answer important questions and to run experiments
  • Advanced segmentation
  • Customer groupings
  • Detailed retention reports available
  • Customer life time value
  • Behavior based analytics
  • Sends notifications to consumers both on the web and on mobile
  • Automation support

The price is free for up to 25,000 data points, which is equal to 1000 profiles. There are paid accounts available starting at $150 per month.


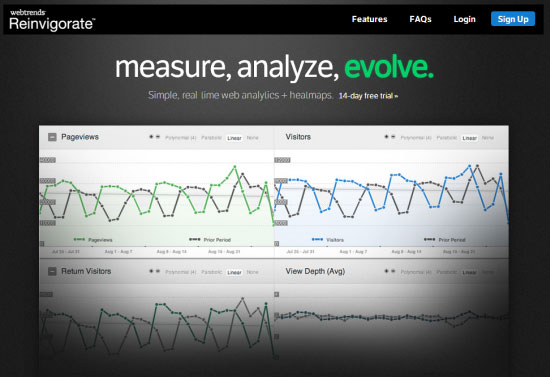
5. Reinvigorate

Reinvigorate

Offered by Webtrends, Reinvigorate is a quality platform. The analytics package is loaded with heat maps and has been designed to be easy to use. The setup is extremely straightforward, similar to that of Google Analytics and it comes with a plugin that can be configured to work with WordPress to make it even easier. In order to improve load times tracking code is delivered by using a CDN.

Features of Reinvigorate include:

  • Heat maps
  • Real time analytics
  • Use name tags to track registered users
  • Breakdowns available hourly, daily, and monthly

The price for Reinvigorate starts at just $10 a month. This provides you with up to 500,000 page views per month for 3 websites and 3 users.


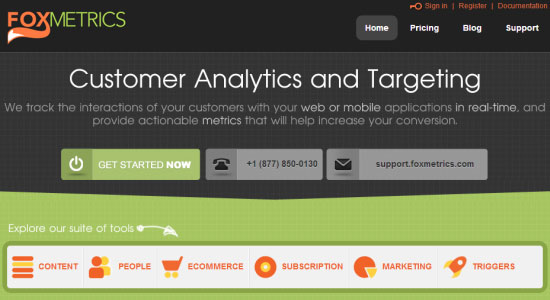
6. FoxMetrics

foxmetrics

If you are considering a solid alternative for Google Analytics, FoxMetrics offers a great choice. It provides more focus on the behavior and actions of each visitor rather than the individual page views. FoxMetrics should typically be used as an addition to another platform such as Clicky or Google Analytics.

The main reason for this is because the focus of the data is different. The pricing is based on requests instead of page views. Essentially, a request is an event. For example, if a user were to download a file and click on 2 links and buy a product you would be looking at 4 requests.

 FoxMetrics Features include:

  • Person level tracking
  • Real time analytics
  • Unlimited users
  • API available

The price for FoxMetrics starts out at $20 per month and this includes 100,000 requests.


7. KISSmetrics

KISSmetrics

Another event based package for analytics is KISSmetrics. This platform is perfect for learning exactly what each of your visitors is worth. Even if the visitor does not make a purchase until six months or a year in the future, you will be able to find out who they are, how they located your site, and which variation of your page that they saw if you have set up any types of split tests.


Some of the features of KISSmetrics include:

  • Unlimited split tests
  • Unlimited reports
  • Data export
  • Data segmentation
  • Group contact lists

With the professional plan you receive one on one consultation as well as a dedicated metrics specialist. The price for KISSmetrics starts at $150 per month, which can be used for up to 500,000 events per month.


8. Woopra

Woopra-analytics

The focus of Woopra is similar to that of KISSmetrics. There have been a number of recent changes made to the platform. Each of the changes have made it that much better as they have been about better understanding behavior and getting to the metrics that really matter instead of just finding out what happened or what is happening.

Some of the best features of Woopra include:

  • Advanced segmentation
  • Desktop client
  • Mobile app
  • Real time stats
  • Live chat available
  • Advanced reporting
  • Custom tagging
  • CRM features

With the paid plans you will receive support options as well. The price is free for up to 30,000 actions each month. There are paid plans available that start at $79.95 per month. At this price you receive 400,000 actions each month.


9. Adobe Analytics

adobe-analytics

Adobe Analytics offers an enterprise level service because of the features that you gain access to. One of the hardest parts of many of the systems is being able to manage your custom tags. Most systems will require you to alter the code to make a simple tweak that would allow you to tag your registered users. With Adobe Analytics you will not need to involve your IT team in order to help create a tag management system.

Some of the features of Adobe Analytics include:

  • Advanced segmentation
  • Real time analytics
  • Video analytics
  • Social and mobile analytics
  • Dynamic tag management

To learn about the pricing for Adobe Analytics you will need to contact the company. Prices tend to start in about the $5000 per month range.


Choosing the Right Analytics Package

It can be difficult to choose the right analytics package to use as everyone has goals that are slightly different. Instead of choosing a package that might work for you, consider your goals and then look at the features that are available to help you make the right choice.


How to Remove Referral Spam From Showing in your Google Analytics (Update 9-24-15)

Posted on: January 11th, 2015 by admin

UPDATE 9/24/15

Adam Steele from Loganix put out a new tool to address referral spam. Works like a charm: Loganix Referral Spam Blocker

Another great article about the subject: http://www.ohow.co/what-is-referrer-spam-how-stop-it-guide/

UPDATE 4/1/15

Been seeing a huge uptick in referral spam lately (social-buttons.com, semalt.semalt.com), which is driving me bonkers! I went in search to find the best option. From everything I have read, this is an exploit of Google’s servers, so adding the code below to your .htaccess file will not work. Below is what I found to be the best solution until Google corrects the issue.

“They use a vulnerability in Google Analytics to make fake visits so the only way to stop them for now, and until Google fix it, is to make a filter in GA since that is the source of the problem.

Blocking them in the .htaccess file is pointless since this kind of Spam never visits your site.

Check this answers for more information about this spam http://stackoverflow.com/a/29312117/3197362

And this for Referrer Spam in General and some methods you can use to filter them and stop future occurrences http://stackoverflow.com/a/28354319/3197362

As for the previous/historical data, you can use segments in Google analytics. Create a REGEX with the Spam names something like this:

social-buttons.com|simple-share-buttons.com

You can add as many as you want, but the REGEX has a 255 character limit. You can add multiple conditions if this happens

    • Go to the Reporting section in your Google Analytics.
    • In the lateral bar, expand Acquisitions > All Traffic and Select Referrals.
    • In the main board Click on +Add Segment.
    • Click on New Segment.
    • Select Conditions Below Advanced.
    • Set filter as Exclude. Change Ad Content for Medium and contains for exactly matches and type and select referral in the text box.
    • Click on AND
    • Change Ad Content for Source and contains for matches regex and paste the Spam Regex.”

Full post can be found here.

The clearing of your referral spam from your website is one of the most important things that you can do to make it easier to see where your traffic is coming from. When you have robot and non-human visits in your reports, it can throw off your SEO strategy and make it very difficult to see where traffic is coming from. The first step is understanding the non-human traffic on Google Analytics. There are three types:

      • Bots and spiders that behave properly like Google’s own spiders.
      • Crawlers like semalt and makemoneyonline.
      • “Fake” referrals that come from darodar, ilovvitaly, blackhatworth and priceg.

So, how do you implement new filters to get rid of this robot traffic? The first step is to use caution and make sure that you are ready to filter these bots. First, make sure that you have zero filters in place right now, that you have a completely unfiltered view. Second, when you do create a filter, do it in a test view that has all the same settings as your main view so that you don’t completely mess up Google Analytics. Finally, when you have determined that the filter is working properly, put it in the main view of your Analytics. Now, here is some specific information on filtering the three types of bot visitors.

The Google Spiders & Other Bots That Behave

If it wasn’t for the Google spiders and others, there would be no internet, no web to surf. Spiders get sent out from their mothership websites to find and index new content. They publish and share content on indexing sites like Google as well as other aggregators. However, publishers and companies that use spiders are required to identify these bots so that they don’t show up in your analytics. Google allows you to easily filter these spiders with one simple checkmark. Just go to the Admin section of your Analytics and go to each view and click View Settings and then check the box that says “Exclude all hits from known bots and spiders.”

Semalt and Other Unidentified Crawlers

It can be difficult to know what to do with bots like Semalt, because some of these identified crawlers are best removed from your reports by going to the website and asking to be taken off the list and others will give you a virus if you try to do that. A good way to judge whether or not the bot is a harmful one is by searching for it and looking at the first 2 or 3 pages of search results to find out if its an infection of just a site that doesn’t like to identify its crawlers as such.

Don’t actually click on the links in the search results when you search for spyware (since you might also get a virus that way) but instead just look through the results and get an idea if it is safe to visit their site or not. If so, then visit and ask to be excluded. In the case of Semalt, it is safe to visit their site and ask to be removed. You can also check the Google Analytics Group for such spiders or the Google Plus page.

As far as removing them without visiting the site and asking to be removed, this is quite simple and something that you’ll do from your Analytics page. But it isn’t the most effective way, because the visits will still show up in the total session information. The best way to do it, if you know how, is to modify the .htaccess file (in Apache web servers). You can find out how to exclude sites at your web host with a little research.

As for filtering using Analytics, you do it by finding a signature to the site. For example, with Semalt (even though you can filter Semalt by going to their site and asking for an exclusion) you could create a filter that would exclude anything from Semalt.com would work. Make sure that your filter doesn’t exclude other sites or referrers that you want to show up in your reports however. Also, keep in mind, you can put a backslash with the domain if you want to exclude all characters like Semalt\.com but you don’t need to because Google apparently fixes this for you.

Also, bear in mind, you will need to modify your filter for each new unidentified crawler and you will run out of filters eventually, so check it without any filters a few times a year as most bots will stop crawling your site after a few months.

Filtering Fake Referrals

Fake referrals are some of the latest arrivals to the game of crawling your website and messing with your Analytics reports. They are from darodar.com, economy.co, ilovevitaly.com and blackhatworth.com and there will probably be more by the time you read this. Why are they called Fake Referrals? Because they haven’t actually visited your site. Instead, they post a fake page view to Google’s tracking service using random tracking ID’s and when one of those are yours, Google shows a hit in your reports.

You might be asking at this point – how can you block something that hasn’t ever actually visited your site? Good question. Using your .htaccess file or Javascript is out, but you can still create a filter to exclude them, but you are going to have a hard time keeping up because as soon as you create a filter for one, another will pop up. They are like cockroaches – or maybe a hydra.

How to Eliminate Fake Referrals Completely

There are a few methods to get rid of these fake referrals. The first and probably most effective way to create an include filter that excludes all hostnames except your valid web hosts. When the fake referral sends their referral they are picking numbers at random and coming from an invalid host name (not one of yours) so by creating an include filter you are able to rid yourself of crawlers that come from hosts that aren’t yours. However, you need to be careful about using this method, because if you do it incorrectly, you will exclude valid traffic, and that will defeat the purpose of excluding this invalid traffic.

You have to make sure that you identify all of the valid hostnames that come with your web host, and you must identify all of he ones that uses your website tracking ID. This might include other websites that you are tracking referrals from, so if you exclude everything but your webhost you will lose referrals like WordPress, Paypal and YouTube.

The best way to do this is to start with a report for several years that shows just the hostnames and then go through them and confirm the validity of each. For example: you can use the All Traffic report, choose medium and then click on referral and add “Behavior – Hostname” as a second filtering level. This will be complex or simple depending upon your sites, or the complexity of your online franchise. This might take some time and some investigating to get it right, but it is important that you do.

Once you have determined what is valid then create a filter that lists all of the domains that you have deemed valid, and then test it to make sure you have not missed any steps. When you are certain you have the entire list, then you can start using it. Remember, you have to update this filter whenever you enter your tracking ID on a new web service, and you should always use an unfiltered view to ensure that you aren’t excluding valid traffic.

Excluding Using Last Tracking Number

There is a method that you can use that seems to work well if you want to test it. Most of the time, spammers sending “fake” referrals target tracking numbers that end in one like (UA-2345678-1) but if you make another properly in your Google Analytics account and change your tracking code to end in 2 or 3 you will notice that most of these fake referrals won’t show up. You may still get a few but most will be targeting the tracking number ending in one. However, the downside to this method is that you lose the continuity or your reports, since you can’t transfer the data from one tracking number property to another.

The Referral Exclusion List

You may find some people recommending that you use the Referral Exclusion List feature from Analytics, but keep in mind, this is not the best solution because it is notoriously unreliable. It might remove some of the crawlers that you don’t want, but it might also change their visit to a direct one and it will keep appearing in your reports. Whether or not this works on ghost referrals depends upon the parameters that the spam creator has set. So, stick with the manual solutions and don’t worry about the referral exclusion list. It isn’t even intended for this sort of filtering anyway.

Why They Send Unidentified and Fake Crawlers

There are several different reasons that someone might send out a bot like the ones that we’ve talked. The most probable reason is that they are sending out a bot to gather information just like the spiders that come from the webservers at Google do. The difference is that while Google is doing it for a specific and legitimate purpose – to index sites in the search results, these other bots are probably doing it for a less legitimate – and possibly quite nefarious – purpose. For example: they are looking for security vulnerabilities.

Another reason that site owners (also known as spammers) send out bots is that they want site owners to visit their site – possibly to install malware, but most likely to get you to visit their site because you want to see who referred to your own site. Semalt does this exact thing, because they sell SEO services. They are targeted small website owners who want to find out who linked to their site (and will hopefully buy SEO services from them).

Finally, it all comes down to spam. They are trying to get as much traffic to their site as possible through the shady method of spamming site owners with referral links and that can get them lots and lots of free page views. The beauty of this method is that it doesn’t show as a bounce for them because many site owners will spend several minutes searching that page for a link to their website.

How They Do It

As for how they do it, this is relatively simple. They look for links on a bunch of webpages, and then follow those links and follow the links that they find there and so on – ad infinitum. The new crawlers will use Javascript to get dynamic page content and then they will trigger the Analytics tracking code because of this.  Or they may not visit your site at all – they just put in a range of tracking IDs randomly selected. But since they don’t know your servers host name it will appear as something else entirely which can tell you that the traffic is manufactured rather than real.

Do You Really Need All Three of These Filters?

Yes, you need all three of these filters. Each one does something different and filters a different type of bot. If you don’t use all three, you are still going to see non-human traffic in your analytics reports.

To Summarize:

Exclude Google Bots and other well-behaved crawlers by telling Analytics to ignore them. Go to Admin > View > Settings.

Exclude Unidentified (Unidentified meaning they don’t self-identify as bots like they are supposed to) Crawlers by editing your .htaccess file or remove them from your reports using filters, but they will still show up when Google determines whether to apply data sampling.

Exclude Fake Crawlers must be removed by an include filter or you can use the method where you change your tracking ID and use that data.


Edit: Block Darodar.com (.htaccess Method)

Add this code to your .htaccess file.

SetEnvIfNoCase Referer darodar.com spambot=yes
Order allow,deny
Allow from all
Deny from env=spambot

To block other referrers, simply change the referrer.


Thanks to Dale from Sudo Rank for this:

Article Here


How to Set Achievable Google Analytics Goals

Posted on: December 3rd, 2014 by admin

How to Set Achievable Google Analytics Goals

Using the goal function in Google Analytics can be an intense experience for anyone who has never used it before. There is a lot of information that it presents to you, and much of it seems unconnected or extraneous. But the fact is, using Analytics goals can be extremely useful if you know how to properly set it up. Here are some ways that you can make Google Analytics goals work for you.

Logging In & Setting Up Goals

Once you have logged into your Analytics account, you need to go to the setup panel. This isn’t where you see Goal Results. Your setup panel is actually accessed by clicking on the sprocket in the upper-right corner. You’ll see the ‘Goals’ tab and then the profile below that.

You can set a maximum of 5 goal-sets and then have a maximum of five goals within each set. You want to think carefully about what you decide to put in these sections because changing them isn’t as easy as just deleting them and starting a new one. You want to set up goals that will allow you to view a great deal of information for one specific goal, so you don’t have to break your goals down to their very basic parts – at least at first.

google analytics picture

Three Goals for E-Commerce

If you are running an e-commerce site, then you want to figure out what the bottom-line goal is for your website. It is usually three basic objectives: First, did the visitor search for and find something that they wanted. Second, did they add it to their shopping cart. Finally, did they complete the transaction. Depending upon what kind of website you have, you might not have an actual shopping cart, but the idea is the same.

It is valuable to understand how a visitor to your site navigates through the search, and you want them to finish searching for the product that they want, so the first goal that you set might be “complete a search.” Your next step will be to make the goal “Active” and set the goal type. You might want to use URL destination, Time on Site or Pages per Visit, but URL destination is a good starting point for this type of goal.

On Goal Details, you want to put in the URL that you want your visitors to get to. For example, if you have a URL that they come to when completing a quick search, you can put that in. However, if you use session ID or parameters in your URLs then you’ll have to enter wildcards or the goal won’t work. But you don’t have to worry about that right now. Also, make sure that you check to box if you have case-sensitive URLs.

Now, you’ll set up the goal funnel, or the way that visitors can achieve the goal. The boxes for the funnel will appear and you decide what steps a visitor should or could take to reach the goal. However, keep in mind that first, you want to keep it simple, like homepage, content pages, goal page. Second, you don’t want to make them required steps because then you will lose other ways that visitors might reach your goal, and that will provide you with valuable information. You’ll see every single way that visitors enter and arrive at your goal as long as you don’t make them required steps.

Watch Your Results

Now, your going to save your goals and watch your results. If you don’t have a thank you page, then you won’t be able to track it normally, so you’ll have to set up virtual pages that will help you track sales. This can be a little technical but with some practice you can figure it out. The main thing is to understand whether or not you are achieving your goal, and more importantly, why you’re not achieving it. This will allow you to make adjustments in the way that your website is set up, and to learn more about your website, and improve the percentage of people that are making it from point A to point B. And that is exactly the purpose of Google Analytics.


Is Your Yahoo and Bing Paid Traffic Showing as Organic in Google Analytics? Here is How to Fix it.

Posted on: November 28th, 2014 by admin

When running a PPC campaign of any sort, getting accurate data on performance is incredibly important. This is what will allow you to fine tune your strategy to ensure you get the maximum CTR from the very most targeted and highly relevant traffic.

If you are using Bing and Yahoo then, it can be very helpful to have all that information available in Google Analytics alongside the rest. This will make it as easy as possible for you to quickly check how your ads are performing versus your organic traffic. Are you get worthwhile ROI for your efforts? Do you need to change your keywords?

To find out, you need to change your destination URLs in order to provide effective tracking by Analytics. This way you can differentiate visitors from your paid results versus organic search and you can identify precisely which of your ads is bringing in the most traffic.

Google Analytics is a powerful tool already for tracking visitors from Google, so all you need to do is to make a few changes with a workaround that will let you see the CPC coming from your CPC from search engines other than Google. I.e. Yahoo and Bing…

Fortunately things have been made a little bit easier since 2010 when Yahoo integrated their campaign management tools into Bing’s (which is called ‘Adcenter’). This makes the process even simpler and easier. Just follow the instructions below and you’ll be able to get all your information in one place with Google Analytics…

Step by Step Instructions for Viewing Bing and Yahoo PPC Data in Google Analytics

Step 1

First you need to create a custom tracking URL. You can do this by using the URL Builder provided by Google (see here).

Just follow the instructions as they come up on the screen and you’ll get your own custom URL string. You can include a unique identifier like ‘Bing-PPC’ which will help you to identify it even more easily.

Step 2

You should see a parameter that says ‘keyword’. Replace this with any placeholder and when Bing generates ads this will be automatically populated. Where it says ‘Campaign Term’ in Google’s instructions use the term ‘{QueryString}’ or ‘{KeyWord}’. Now when someone sees and clicks on one of your ads, you’ll be able to see which search term they used in order to see that ad.

Step 3

Head to the Bing Adcenter and here use the custom URL you just created as your tracking URL in the campaign.

Change the ‘Destination URL’ at the Ad Group Level to make sure that you aren’t using the same URL for every single keyword. To do this, choose ‘Ad Group’, then ‘Ads Tab’. From here you want to click on ‘Ad Title’ and this will give you the option to paste your destination URL. Remember to click save before exiting!

Do the same for each ad group. It shouldn’t take too long unless you have a massive campaign.

Step 4

Once you’ve done this you will start to see your data but this is going to be the combined data from both Bing and Yahoo. If you want to break it down so that you see the specific metrics for each then things will get a little more complicated.

First you’ll need to set up a new profile in Analytics. Now you can create a new filter (use the Admin section of Analytics). Here you’ll want to place the following in Field B:

Extract B case is: http?://([^/]+)

You don’t really need to know what’s going on here but suffice to say that the referring domain will now show with the campaign source which will let you tell whether your clicks came from Bing or Yahoo.

Step 5

It will take a couple of days for these changes to take effect. Come back in two days and you should start to see your data clearly divided by source and whether or not it was paid traffic. It should look as follows:

Bing / CPC

Bing / Organic

Google / CPC

Google / Organic

Yahoo / CPC

Yahoo / Organic

If that’s what you see then congratulations – you’re good to go! Remember though, search engines do make changes to the way they work from time to time so you might need to take further action in future. For now though, enjoy all those metrics and use it to hone your campaigns to perfection!


How to Use Google Analytics to Track Conversions

Posted on: December 2nd, 2013 by admin

Google Analytics is a free service provided by Google to marketers who want to track conversion behaviors to their websites. The service collects data about visitors such as where they originated, how long they remained on a certain page and other important information. Google Analytics has the ability to track the visitors referred by search engines, direct visits, social networks, display advertising, referring sites, email marketing, pay-per-click and links within PDF content.

 The basic service is free or you can upgrade to a paid service.

Paid training courses on how to use the service are taught in major cities across the country and online. Many marketers use the free online instructions provided by Google. These tutorials are comprehensive with written content and videos to help you learn what to do to begin analyzing your website. This article concentrates on tracking conversions using Google Analytics.

Conversions

Conversions are goals set by the owner of a site. A website is created to meet one or several goals. A goal is met when a visitor performs a desired action such as:


  • Spending a specific amount of time on the website
  • Viewing a specific number of pages
  • Accessing a specific page
  • Downloading a file

Each of these goals is found within one of the three major goal categories in Google Analytics:


  1. URL destination goal: measures performance based on visitors who accessed a certain page and visitors that didn’t

2.  Time on site goal: measures the preset minimum and maximum amount of time a visitor spent on the site

3.   Pages/visits goal: measures the preset minimum and maximum number of pages a visitor accesses during a visit


How to Setup Goals in Google Analytics

1.    Under analytic settings, go to “Select Profile Settings”

2.    Click on “Add Goal.”

3.    Enter goal details:


  1. Enter name of the goal
  2. Select the goal type (URL, time, pages/visits)
  3. Fill in the information according to goal type as shown below:


MetricURL Destination GoalTime on Site GoalPages/Visit Goal
ConditionHead match: matches corresponding URL plus additional parameters at end of string

Exact match: match exact URL

ReGex match: matches URL depending on regular expressions

Greater than, less thanGreater than, equal to
ValueGoal URL: destination page you want visitor to accessDetermine the target time: hours, minutes, seconds


Determine the target number of pages to be viewed
Goal ValueDetermine goal valueDetermine goal valueDetermine goal value


  1. Choose whether or not to add a *funnel for URL destination match goals.


* A funnel is a predetermined navigational path set by the marketer for the visitor to reach the conversion page.

The goal value is determined by what each goal brings to the company from the e-commerce perspective. For example, if your sales team closes 10% of the visitors who request a call back and the sale is approximately $500, then the goal value is $50.00.

Google Analytics will help you determine which marketing campaigns are the most effective for your business. Not only will you be able to increase your efforts with the most effective campaigns, but you’ll also know which campaigns to suspend or revamp. This is an accurate marketing tool that can accurately help you get the most from your website.


7-Point Checklist of a Converting Sales Page

Posted on: October 30th, 2013 by admin

Many people believe that creating a successful converting sales page is an art achieved after many years of training and subsequent experience. We have all heard of copywriting geniuses such as David Ogilvy, Robert Collier, Steve Slaunwhite and Leo Burnette and think we can never obtain what they have achieved in the world of copywriting.

Actually, it’s not necessary. I have written many successful sales copy pages for my own products and for clients with the system I’m about to show you. This checklist works because it’s a step-by-step plan that eliminates being overwhelmed by the copywriting process. It works for any product you or your clients want to sell. Follow the system step-by-step to a completed and effective sales page.


Check Point #1 – Know the Benefits of Your Offer

You must begin by knowing the benefits of the product and offering these benefits to the customer. Benefits are different from features. For example, a feature is a programmable timer on a coffeemaker. The benefit the customer enjoys from this feature is the ability to set the coffeemaker to come on at a certain time in the morning waking him up to the fresh aroma of coffee brewing.

Yes, there are a lot of coffeemakers with programmable timers. What makes your timer different from the others? Differences can sell when they’re pointed out. Maybe your coffeemaker is easier to program with only 2 steps necessary. Or maybe you can set your timer to come on multiple times without resetting it each time.

A difference could also be a value benefit that other manufacturers don’t offer. For example, with the purchase of your coffeemaker the consumer receives one bag of a special blend coffee once per month for a whole year.

If your coffeemaker is exactly the same as a competitor’s product, you have an opportunity to brand your product. For example, Kentucky Fried Chicken and Popeye’s are both fried chicken restaurants, so to make them distinctive they are heavily branded.

It’s important for affiliates to know the particulars of the products they sell. Knowing every benefit of a product produces better promotion and adds to the number of angles that are available to sell the product.


Check Point #2 – Who is Your Target Market?

Now that you know the benefits of the product, you can know the best markets for your offers.

Reading the titles on magazine covers is a great way to determine what’s on the minds of consumers in your niche. Magazine editors know what their customers want and leave all types of clues through their covers, articles and ads.

The magazines at the checkout counter cater to women. These magazines know how to attract the attention of women through testing colors, headlines, topics and graphics. On one hand they target a woman’s need to lose weight with headlines such as, “This Skinny New Mom Lost 35 Pounds in Six Weeks.” They also cater to that new mom’s love for baking delicious treats for her family. That headline will read, “7 Scrumptious No-Bake Pies.”

If your niche is in relationships, fitness, kids, marriage and other niches important to women, you know that your general target audience is women.

Men, on the other hand, are not into talking about what’s on their minds or how they feel. Men’s magazines are just as targeted to the things that men like as women’s magazines are to women’s interests. Men need status and to know how to get larger, stronger, harder, richer and thicker. Study the articles and ads in men’s magazines if your niche corresponds to any of these needs.

Now that we know our product’s benefits and who to market them to, we can write our copy.


3. Your Headline is 80% Of Your Ad Copy

Your headline is the most important section in your ad copy. Your title will determine if the rest of the copy gets read. Visitors take a few seconds to read your headline and then decide if they should read the rest of the copy. Without a good headline the rest of your amazing ad copy won’t get read.

Tip: Sometimes your compelling title is hidden in the body of the copy. If you’re having trouble coming up with the right headline, wait until after you’ve written the body.

Whether you are producing copy for your product or for a client, it’s a fantastic idea to think of 4 or 5 different headlines for testing purposes. Changing headline to measure response is a simple testing procedure. Conduct this test to measure response alone without changing other variables.

Perfecting your headline creation skills helps you to think longer and harder about the benefits of your product. You’ll become a better marketer for your efforts.

Here are several tips for writing headlines that convert:

  • Include the best benefit of your product in your title. Here is where the importance of knowing the difference between a feature and a benefit comes into play. The feature is a part of the product while the benefit is what the feature does for you. Benefits are the results you receive because you used the product. Present the benefits of a product and you will sell more of the product.
  • It’s possible to place more than one benefit in the headline and the headline can include one or two sentences. The only requirement is to include the strongest benefit in the headline. Even though a free bonus, a money-back guarantee and free shipping are good benefits, they don’t tell the reader what they can expect the product to do.
  • Now that you’ve completed 80% of your ad copy with the headline, you can move on to the body of your ad. If you wrote your headline correctly, your target audience is ready to read the rest of your copy.


4. Bullet Point Lists

Bullet point lists can be considered extensions of the headline. They are almost as good at converting offers as headlines, so don’t neglect using bullet point lists. Just remember to use them in conjunction with headlines written and tested as discussed above.

Here are some tips on writing effective converting bullet point lists:

  • Your bullet point list is a summary of the benefits in a few words. The text of a bullet point is no more than five or six words. The text length should never spill into a second line. A bullet point is meant to be brief and to the point.
  • Although bullet points consist of benefits rather than features, you can sprinkle one or two features among the bullet list, but only if your headline contains the strongest benefit.
  • If your product has several benefits and uses, you can use several bullet point lists in your copy as long as you use proper copy lead-ins before each list. It’s important that your copy ad is long enough to accommodate several bullet point lists.


5. Body Copy Style

Good sales letters are a combination of art and science. In order to become a great technician the writer must be committed to an enormous amount of work and practice. It’s impossible to point out all the minor things that make up a successful sales letter in this short tutorial. Here are a few features that will get you started forward creating good body copy.

  • This is not the place to show off all the big words in your vocabulary. They may make you look super intelligent, but they won’t make you any money. You’ll need to dumb it down enough for a fifth grader who is having trouble with reading to understand. The average adult still reads at this level and the super reader won’t mind the simplicity of your copy. Money is always green no matter who sends it to you. Direct and clear copy is remembered.
  • Write short sentences. Master the art of writing one or two word sentences. Two words. Even. One. Word. Ad writers are famous for this writing technique because it works. It is effective and gets your point across quickly.


  • Paragraphs are limited to one or two sentences. Your customers will soon grow tired of reading all that extra stuff you’re saying and will wonder why you won’t get to the point.
  • You don’t want to make your readers have to think hard. In fact, they refuse to do that. Limit your sentences to one single thought. Otherwise, confusion sets in.
  • Don’t be afraid that a long sales letter won’t get read. If your product has a lot of benefits to talk about, put them in long copy rather than skip or combine benefits. Drew Whitman, author of “Ca$hvertising” says, “The more you tell, the more you sell.” You never need to worry that you’re placing too many benefits in your ad copy.


  • Make your sales copy a personal conversation between you and the prospect. Use first person pronouns such as “you,” “I,” “us” and “we” to give the feeling of relationship and family. Their needs are more important to them than anything else. The product you’re talking about will help solve their problem. Addressing them with “you” is the next best thing to calling them by name.


6. Seize the Sale

Congratulations for leading the prospect this far into your sales letter. They are only seconds away from hitting the “Buy Now” button. Here are some tips on how to wrap it up with a sale.

  • Create a sense of urgency with scarcity. Examples of scarcity: with every 5th purchase the price increases, we only have 2 left at this low price, you’ll have to pay full price after October 1st.
  • Acknowledge the reader may still have some doubts or concerns. For example, address a major concern such as, “I know you’ve tried other products that just didn’t work for you…” and then counter with a feature and its benefit that your product has that the others don’t have.
  • Mention your 100% money-back guarantee that if they are not satisfied for any reason, they can return the product with no questions asked and get a refund. Set off the guarantee with a border and a big gold seal to emphasize you mean what you say.
  • People who have read almost to the end of your sales letter may change their minds at the last minute and prepare to leave without making the purchase. It’s not too late to get an email address by offering them a free gift.
  • Mention your best benefit again when you’re asking for the sale. Example: You are Only 3 Days Away from Clear Skin for just $19.95.


7.  Avoid the 7 Deadly Sins of the Landing Page

Here is an itemized list of the 7 deadly sins of the landing page that I’ve observed in sales copy:

  • Thou shalt not create a headline without including the best benefit. They came to you for a solution, so you must address in the headline that your product has the solution and why and how it delivers.
  • Thou shalt not place the headline below the fold. The headline takes precedence over the graphics in your header. The headline with the best benefit must be the focus of the page.
  • Thou shalt not neglect to place a “BUY NOW” button (or any purchase method you may be using) above the fold and another one below the fold. Make it easy for people to buy the product. They may be convinced to buy after reading your headline.
  • Thou shalt not place “BUY NOW” buttons on the left side of the copy. We read from left to right, so you want to place your buttons on the right side of the copy.
  • Thou shalt not copy and paste sales copy. If you decide you can’t write it better than the other guy, at least make sure the copy fits your offer. Go through the ad you swiped to thoroughly remove the old product name and features and any tracking codes. If you aren’t experienced in removing tracking codes, don’t copy and paste! Running your copy through spell check and fixing typos and formatting errors is the least you could do as a professional copywriter.
  • Thou shalt not neglect including TOS and disclaimers. This is especially important with health and financial products, but should not be ignored in other niches as well. You may not run into any problems at first, but as soon as you start having a substantial sales volume, trouble may come. To be compliant with rules and regulations is to keep your business safe from shut down.
  • Thou shalt always ask for the sale. Never assume the reader will automatically buy without an invitation to buy. You must lead them to the BUY BUTTON to get to the shopping cart in order to seize the sale.


Best SEO Firm Sitemap
5533 Point Pleasant Pike Doylestown, PA 18902